Wednesday, 27 April 2016

 Cheesy, saucy lasagna dip that whips up in less than 30 minutes and goes perfectly with any favorite Italian dish! 
Lasagna Dip
Lasagna Dip
Lasagna Dip

Lasagna Dip
Lasagna Dip
On a different, but equally cheesy note, this lasagna dip is also heaven. Saucy, cheesy, Italian goodness in the form of a dip you can dunk your favorite garlic bread or breadsticks into. I’m in love with it! My husband and I don’t even like traditional red lasagna, but we both died of bliss when we tasted this dip. No noodles, just all of the cheese and saucy wonderfulness that goes into a lasagna dip, except it’s dip-able. Everything is better when it’s dip-able. This is an absolute must-make for your next Italian night, it will go perfect with any of your favorite pasta dishes!
Lasagna Dip
LASAGNA DIP
PREP TIME
COOK TIME
TOTAL TIME
Cheesy, saucy lasagna dip that whips up in less than 30 minutes and goes perfectly with any favorite Italian dish!
Author: 
Recipe type: Appetizer
Cuisine: Italian
Serves: 4
INGREDIENTS
  • 8 ounces ground turkey
  • 1 tablespoon oil
  • 8 ounces ricotta cheese
  • 1 cup shredded parmesan cheese, divided
  • 2 cups Italian-style tomato sauce (use your favorite red pasta/pizza sauce - I used a garlic basil version from Bertolli)
  • ½ cup shredded mozzarella cheese
  • optional: fresh parsley
  • breadsticks or garlic bread for dipping
INSTRUCTIONS
  1. Preheat oven to 350.
  2. Add ground turkey and oil to a pan. Stir over medium heat until cooked through, being sure to break up the sausage into small pieces as it cooks. Set aside.
  3. Mix together ½ cup parmesan cheese and ricotta cheese. Spread mixture into the bottom of a small-medium casserole dish.
  4. Add tomato sauce in an even layer on top of ricotta mixture. Top with ground turkey. Sprinkle remaining parmesan cheese and mozzarella cheese on top of the meat and sauce.
  5. Bake for 15-20 minutes until cheese is bubbly. Top with fresh parsley if desired and serve with breadsticks or garlic bread for dipping. Enjoy!
0

Tuesday, 26 April 2016

These Chicken Enchilada Roll Ups are a great appetizer for parties! Easy to make ahead and easy to serve. 
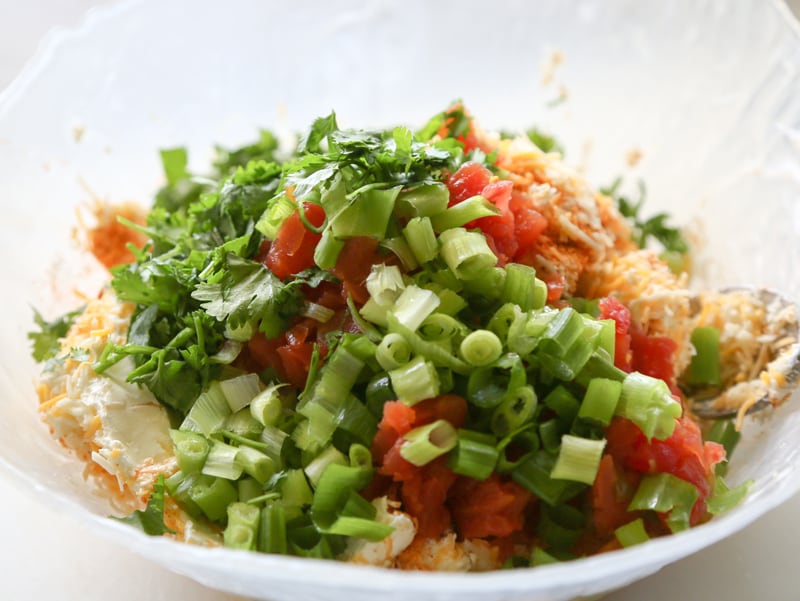
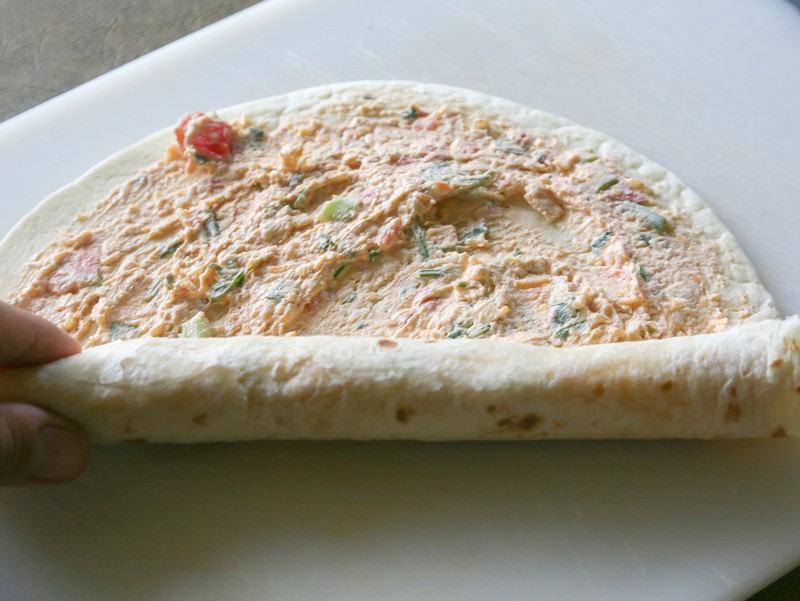
Start by flavoring your cream cheese with some taco seasoning.These Chicken Enchilada Roll Ups are a great appetizer for parties! Easy to make ahead and easy to serve. the-girl-who-ate-everything.comAdd a can ofdiced tomatoes and green chilies, some cilantro, chicken, cheese, and green onions.These Chicken Enchilada Roll Ups are a great appetizer for parties! Easy to make ahead and easy to serve. the-girl-who-ate-everything.comSpread the mixture on a tortilla making sure to get to the very edges and roll it up tight.These Chicken Enchilada Roll Ups are a great appetizer for parties! Easy to make ahead and easy to serve. the-girl-who-ate-everything.comAt this point you can slice them up and serve or chill them until ready to serve and then slice them up.


Ingredients
  • 2 (8-oz) packages cream cheese, softened
  • 1½ cups shredded Mexican cheese
  • 2 tablespoons Old El Paso taco seasoning
  • 2 cups shredded chicken (rotisserie chicken works well)
  • 1 (10-oz) can diced tomatoes with green chilies, well drained
  • 1 teaspoon minced garlic
  • 4 green onions sliced
  • ½ cup chopped cilantro
  • 8 burrito sized tortilla

    Instructions
    1. In a large bowl, combine all of the ingredients (except tortillas) until well blended.
    2. Spread about ½ cup of the mixture over the entire surface of a tortilla. Roll up tightly. Repeat with remaining tortillas.
    3. Refrigerate until firm, about 30 minutes.
    4. Slice into ½ inch slices and serve.
0

Friday, 22 April 2016

THIS THAI CHICKEN SALAD RECIPE IS PACKED WITH TEXTURE AND ANYTHING BUT BLAND!

Thai Chicken Salad with Ginger Lime Dressing - This healthy Thai salad recipe is packed with flavor and texture! Naturally gluten free and peanut free, this is a healthy meal you won't want to miss.
Today, I’ve got a Thai Chicken Salad with amazing texture and flavors.
Thai Chicken Salad with Ginger Lime Dressing - This healthy salad recipe is packed with flavor and texture! Naturally gluten free and peanut free, this is a healthy meal you won't want to miss.
let’s share a salad that is perfect fuel for an intense workout.  And speaking of intense, this Thai Chicken Salad is packed with flavor. I adore the color and texture.
Adapted from Clean Eats
Ingredients
  • 1 tablespoon coconut oil 
  • 1 small red onion, chopped fine
  • 1 teaspoon minced garlic
  • 1 pound boneless skinless chicken
  • 4 tablespoons lime juice
  • 3 tablespoons fish sauce (Red Boat brand)
  • 1 inch piece fresh ginger, peeled and grated (or 2 drops Ginger Essential Oil)
  • 2 teaspoons red pepper flakes
  • Honey, to taste
  • 3 tablespoons extra virgin olive oil
  • 4 cups shredded Napa cabbage
  • 3 carrots, grated
  • 2 scallions, chopped
  • ¼ cup fresh basil, chopped
  • ¼ cup fresh cilantro, chopped
  • ¼ cup raw cashews, toasted and chopped
Instructions
  1. Heat coconut oil over medium high heat. Add onion and garlic and cook for two minutes. Add chicken and saute until browned and the chicken is fully cooked. Allow to cool and shred chicken
  2. Make dressing by whisking together lime juice, fish sauce, ginger, and red pepper flakes. Slowly whisk in olive oil until emulsified. Add honey to taste.
  3. In a large bowl combine cabbage, carrots, scallions, basil, cilantro and chicken. Toss with dressing. Top with cashews and serve.
0

Monday, 18 April 2016

Mongolian Beef
These crispy, sticky, flavor-pumpin’ beef pieces are first fried to a golden crispy perfection, then coated in a sweet and salty sauce to get it all soaked into the beef. It’s got that perfect balance of semi-crispy and saucy-sticky combination. This will make you feel like you might be in the Chinese restaurant of your dreams. Surprise! It’s your kitchen.
Mongolian beef is a dish that is served at a lot of American-Chinese restaurants, similar to Szechwan style beef here in Canada. It is super quick and easy to make at home and much better than takeout!
It’s the combination of crispy and sweet-sticky that makes it SO good.
Here, take the chopsticks.
Mongolian Beef
You can make Crispy and Sticky Mongolian Beef with any beef suitable for grilling. But make sure to slice the beef against the grain i.e. cut perpendicular to the direction of the fibers. This will make the beef more tender.
This is preferably made in a wok, but if you don’t have a wok, fry the beef in a small saucepan. It won’t work in a skillet because the surface area is too large and the oil spreads too thinly, which interferes with beef crispiness.

Marinade Ingredients:

1 lb beef steak, trimmed of fat and sliced into 3 mm slices
2 tbsp soy sauce
1/2 tbsp sesame oil

Crispy Beef:

1/3 cup frying oil
1/4 cup cornstarch

Sauce Ingredients:

1/2 tsp ginger, finely minced
3 garlic cloves, finely minced
1/4 cup soy sauce
1/3 cup chicken broth
1/2 tsp red chili pepper flakes
2 tbsp brown sugar
1 tbsp cornstarch, mixed with 1/4 cup water
few scallions, cut into 1-inch long slices
Mongolian Beef
First combine the marinade ingredients in a medium bowl and marinate the beef for 30 minutes. Then lightly coat each piece in cornstarch with your hands on a separate plate.
Heat the oil in a wok or a small saucepan on high heat. Once the oil is hot and about to smoke, reduce the heat to medium high, add the beef in batches and fry on one side for 3 minutes. Do not overcrowd the pan. Then flip and cook the other side for 30 seconds or until golden and crisp. Repeat with the remaining beef.
If not using a wok, transfer 2 tablespoons of oil used from frying the beef into a bigger saucepan. Heat the pan on medium high heat and add garlic with ginger. Sauté for 15 seconds, watch for it not to burn.
Then add soy sauce, red chili pepper flakes, chicken stock and bring to a boil. Reduce the heat and simmer for a couple of minutes on low. Add the brown sugar, and stir until dissolved. Slowly incorporate the cornstarch mixture into the pan and stir until the sauce coats the back of a spoon.
Add the beef, scallions and mix everything together for 1 minute or so. Serve immediately with steamed rice or noodles. Or if you’re like me, you can eat a whole plate of this this this this thisssss 😍😍😍 on it’s own.
Mongolian Beef

Crispy and Sticky Mongolian Beef
Prep time
Cook time
Total time
Author: 
Recipe type: Main/Appetizer
Cuisine: Asian
Serves: 4
Ingredients
  • Marinade Ingredients:
  • 1 lb beef steak, trimmed of fat and sliced into 3 mm slices
  • 2 tbsp soy sauce
  • ½ tbsp sesame oil
  • Crispy Beef:
  • ⅓ cup frying oil
  • ¼ cup cornstarch
  • Sauce Ingredients:
  • ½ tsp ginger, finely minced
  • 3 garlic cloves, finely minced
  • ¼ cup soy sauce
  • ⅓ cup chicken broth
  • ½ tsp red chili pepper flakes
  • 2 tbsp brown sugar
  • 1 tbsp cornstarch, mixed with ¼ cup water
  • few scallions, cut into 1-inch long slices
Instructions
  1. First combine the marinade ingredients in a medium bowl and marinate the beef for 30 minutes. Then using your fingers lightly coat each piece in a plate with cornstarch.
  2. Heat the oil in a wok or small saucepan on high.
  3. Once the oil is hot and about to smoke, reduce the heat to medium high, add the beef in batches and fry on one side for 3 minutes. Do not overcrowd the pan.
  4. Then flip and cook the other side for 30 seconds or until golden and crisp. Repeat with the remaining beef.
  5. If not using a wok, transfer 2 tablespoons of oil used from frying the beef into the bigger saucepan.
  6. Heat the pan on medium high and add garlic with ginger.
  7. Sauté for 15 seconds, watch for it not to burn.
  8. Then add soy sauce, red chili pepper flakes, chicken stock and bring to a boil.
  9. Reduce the heat and simmer for couple minutes on low.
  10. Add the brown sugar, and stir until dissolved.
  11. Slowly incorporate the cornstarch mixture into the pan and stir until the sauce coats the back of the spoon.
  12. Add the beef, scallions and mix everything together for 1 minute or so.
  13. Serve immediately with steamed rice or noodles.
0

0

0

Thursday, 14 April 2016


Mall Chicken Teriyaki, by thewoksoflife.com
1K+
We’ve all done it, in shopping malls across America. The ride up the escalator to the food court. The slow but purposeful full circle around all the vendors, plucking toothpicked free samples from styrofoam plates proffered on plastic trays. The carefully furrowed brow whilst contemplating each sample, to show the hopeful faces holding those trays that they’re very much in the running.
In all my years of mall-going––from junior high days spent looking for tiny, overpriced, sparkly t-shirts to the obsessive bargain-hunting of today––the sample guy with the most success has always been the chicken teriyaki guy.
This is a recipe for that mall chicken teriyaki that you’ve probably found yourself lining up for once or twice. I know I say this a lot, but you’ll be really surprised at how easy it is to make. You can take what those guys at Sarku Japan (or whatever equivalent chain you probably have at your local mall) do on a giant flat-top griddle, and replicate it in your own kitchen, with just 9 ingredients (10, if you count the steamed rice you’re going to serve it on top of!).
If you’re not in the mood to head to the mall, but you’re craving that plate of “mall” chicken teriyaki, then you’re going to love this.
Mall Chicken Teriyaki, by thewoksoflife.com
You’ll need:
  • 2 pounds boneless skinless chicken thighs, cut into small chunks
  • 2 tablespoons mirin
  • 2 1/2 tablespoons soy sauce
  • 1 tablespoon brown sugar
  • 3/4 teaspoon grated ginger
  • 1 teaspoon sesame oil
  • 1 tablespoon cornstarch
  • 2 tablespoons oil
  • steamed rice, to serve
Add the chicken to a bowl, along with the mirin, soy sauce, brown sugar, ginger, sesame oil, and cornstarch.
Mall Chicken Teriyaki, by thewoksoflife.com
Mix together until all the ingredients are well combined. Allow to marinate for 2 hours.
Mall Chicken Teriyaki, by thewoksoflife.com
Heat the oil in a wok or large skillet over medium high heat. Transfer the chicken to the pan in one layer (reserving the marinade), and allow it to sear on one side for 1 minute.
Mall Chicken Teriyaki, by thewoksoflife.com
Then start stir-frying for another minute.
Add the reserved marinade to the pan, reduce the heat to medium, and simmer to reduce the sauce until it thickens and coats the chicken. Serve over rice!
Mall Chicken Teriyaki, by thewoksoflife.com

Mall Chicken Teriyaki
Prep Time: 2 hours, 15 minutes
Cook Time: 5 minutes
Total Time: 2 hours, 20 minutes
Yield: 4 to 6 servings
Ingredients

2 pounds boneless skinless chicken thighs, cut into small chunks
2 tablespoons mirin
2 1/2 tablespoons soy sauce
1 tablespoon brown sugar
3/4 teaspoon grated ginger
1 teaspoon sesame oil
1 tablespoon cornstarch
2 tablespoons oil
steamed rice, to serve
Add the chicken to a bowl, along with the mirin, soy sauce, brown sugar, ginger, sesame oil, and cornstarch. Mix together until all the ingredients are well combined. Allow to marinate for 2 hours.
Heat the oil in a wok or large skillet over medium high heat. Transfer the chicken to the pan in one layer (reserving the marinade), and allow it to sear on one side for 1 minute. Then start stir-frying for another minute.
Add the reserved marinade to the pan, reduce the heat to medium, and simmer to reduce the sauce until it thickens and coats the chicken. Serve over rice
0

Wednesday, 13 April 2016

The secrets to a really great Thai curry using store bought curry paste are: sautéing the curry paste with onion, garlic and fresh chilli, and simmering the curry with kaffir lime leaves (key tip). Plus my secret tip for a thick, extra saucy, extra tasty sauce with 1/3 less calories – MANGOES. Seriously.

Mango Thai Red Curry with Chicken - Restaurant quality, extra saucy, thick and creamy, 1/3 less calories, this Thai Red Curry is truly incredible.
This Mango Thai Red Curry. There are no words. Honestly, I think it’s the best “from scratch” invention to come out of this kitchen for a while. LOOK how thick and saucy it is! With 1/3 less calories!!!
Mango Thai Red Curry with Chicken - Restaurant quality, extra saucy, thick and creamy, 1/3 less calories, this Thai Red Curry is truly incredible.
Everyone loves a great curry, especially creamy coconut milk ones. But I rarely have Thai curries midweek because of the caloriesCoconut milk is seriously loaded with calories. There are 920 calories / 3,850 kilo-joules in one 400g/13oz can of coconut milk. Did you know that??
Sure, you could go low-fat coconut milk. But it’s nowhere near the same……Those who have tried it will know exactly what I’m talking about when I say that the curry sauce is watery instead of creamy.
So the awesome discovery I made?? Switch out half the coconut milk with mango puree. That’s right, mangoes! In puree form it’s thick and creamy, has the sweetness of coconut milk – the PERFECT coconut milk substitute. With less than 1/3 of the calories of coconut milk.
Mango-Puree_Side-by-side
And in case you are concerned, NO it’s not too sweet! Coconut milk is sweet anyway, so it basically replaces that. Plus, here are the ratios I use: 1 can (400g/13oz) coconut milk, 1 cup mango puree and 3/4 cup chicken broth/stock (thins out the mango, adds extra flavour depth).
There is no way anyone would taste this curry and think “this is sweet”.
Mango Thai Red Curry with Chicken - Restaurant quality, extra saucy, thick and creamy, 1/3 less calories, this Thai Red Curry is truly incredible.
To be clear – I did not invent this recipe in a bid to lighten up curry! I made it simply because I thought it would be delish – and it blew me away. And my taste testers. Especially when I told them it was so much healthier than the usual red curry!
I really hope you try this. I can’t stress enough how delicious it is! Thick, creamy, EXTRA saucy with less calories. *Eyes fluttering* Thai curry heaven. 


COOK TIME
TOTAL TIME
The secrets to making a GREAT curry using store bought curry paste are: saute the paste with onion, garlic and chilli, simmer the sauce with kaffir lime leaves (KEY TIP!) and using fish sauce for seasoning. This curry is made using mango puree which is a miracle way to make a thick saucy curry but with ⅓ less calories than just using coconut milk (mangoes have ⅕th of the calories of coconut milk!). Read more in Note 2. If you don't have mangoes, you can make this with just coconut milk which is just as tasty but has more calories - see Note 3.
Author: 
Recipe type: Dinner
Cuisine: Thai
Serves: 3-4
INGREDIENTS
  • 1 tbsp oil (vegetable, canola, grape seed)
  • 3 garlic cloves, minced
  • ½ tsp ginger, minced (not critical)
  • ½ - 1 tsp red chilli, minced (Optional. I used 1 tsp.)
  • 1 small onion, sliced (brown, white, yellow) or 3 eschallots
  • 1.2lb / 600g chicken thigh fillets (or breast), cut into bite size pieces
  • 4 - 5 tbsp Thai Red Curry Paste (Note 1)
  • 1 can (400ml/13oz) coconut milk (full fat is better but low fat is ok too)
  • ¾ cup chicken broth
  • 1 cup mango puree, preferably fresh (1 large mango) (Note 2)
  • 1 tbsp fish sauce
  • 2 kaffir lime leaves
To Serve
  • Jasmine rice
  • Coriander/cilantro leaves
  • Lime wedges
  • Fresh red chili, sliced
INSTRUCTIONS
  1. Heat oil in a skillet over medium high heat.
  2. Add garlic, ginger, chilli (if using) and onion and saute until the onion is starting to soften.
  3. Add chicken and cook until white all over but still raw inside.
  4. Add curry paste and saute for 2 minutes until fragrant.
  5. Add coconut milk and chicken broth. Bring to simmer, stirring to dissolve the curry paste into the liquid. Then add the mango, fish sauce and kaffir lime leaves.
  6. Turn heat down to medium and simmer for 12 - 15 minutes, stirring occasionally, until the sauce is thickened. Adjust saltiness using fish sauce.
  7. Serve over jasmine rice, garnished with coriander/cilantro, wedges of lime and slices of red chilli, if desired.
NOTES
1. I use Maesri Red Curry Paste which you can get from Woolworths supermarket in Australia. I also useAyam on occasion.

2. To make mango puree, place mango in a food processor of blender and whizz until smooth. A handheld stick blender can also be used.

If you can't find fresh mangoes, either defrost then puree frozen mango or use canned mango (pieces, drained, or pureed). Mango juice is not suitable because it is watered down.

3. To make this with just coconut milk, leave out the mangoes and chicken broth/stock and use 1½ cups extra coconut milk (just under 1 extra can). The nutrition information for this alternative is below.

0

Don't Forget To Hit Like